


Ed Bommer
B&O 70' Steel, Stream-Styled Baggage Car
Class B-8aa, Number 627
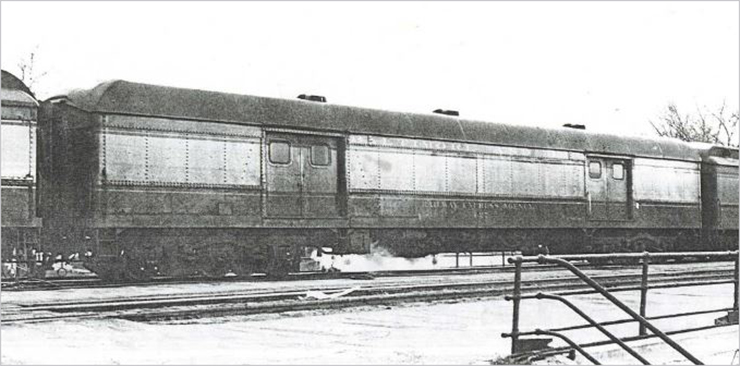 Sometimes you can run across a photo and catch that there is something about the subject that is different. B&O baggage car 627 was so seen and on close study, it’s different from other B&O ClassB-8 baggage cars. That arched roof is one feature. So are the baggage doors fitted with Thermopane window glazing. An attempt had been made at stream-styling (as B&O named it) a 1920s heavyweight baggage car. It was done to blend with other stream-styled heavy-weight cars rebuilt in the 1930s for top name trains: The National Limited and the Capitol Limited, as well as the pre-WWII Columbian and the Royal Blue. All these trains featured re-built, modernized heavyweight cars. The more modern looking Cincinnatian of 1946 was built from of heavy-weight cars much the same way.
It took some time to check out car 627. It was the only B&O baggage car so outfitted and the sole member of ClassB-8aa. Originally built by ACF at its St. Charles MO plant in 1923, the Thermopane windows in the doors date its rebuilding to sometime in the post-War 1940s. This photo was used as a reference, as well as a B&O diagram for ClassB-8 baggage cars, which does not show any of the improvements seen on car 627.
Further, this car had its moment of fame on a weekend in October 1957, serving in the MAIN train Royal special of Queen Elizabeth II, following her state visit with President Eisenhower. The rail trip was made from Washington DC to Staten Island, to experience and enjoy a ferry ride to Manhattan.
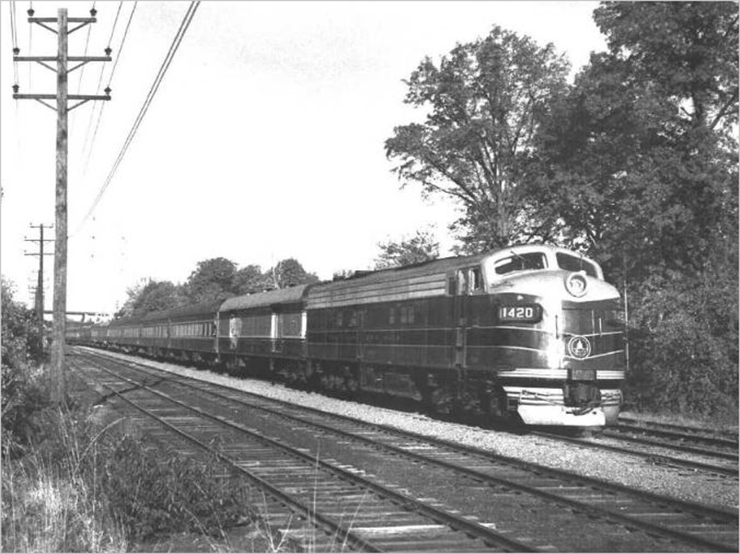 On Monday morning at about 9:30 AM October 21, the 12 car Royal train was photographed by Bill Burke as it eased off the Lehigh Valley interchange with the Staten Island Rapid Transit in New Jersey. This train as well as a preceding 11 car special for the press, spent a high security overnight at Camp Kilmer.
Both trains departed Washington DC late Sunday night, running non-stop to Camp Kilmer NJ via B&O and Reading Company. Lehigh Valley led both trains, an hour apart, the next morning to Staten Island Junction and the SIRT. Reading and Lehigh Valley pilot crews boarded and alighted from the trains as they slowed to a walk at interchange points. An article on this event was published in the B&O RR Historical Society magazine, “The Sentinel,” fourth quarter of 2004.
In this photo, B&O baggage car 627 with SIRT Superintendent J. F. Stevens standing in a doorway follows B&O E-7 number 1420. SIRT Road Master of Engines Frank Kirby is in the cab as pilot for the B&O engineer. Only a single unit was used on this part of the trip for each train, due to weight restrictions for the 1887 built 500’ long single track iron swing-bridge over the Arthur Kill between New Jersey and Staten Island.
There is a construction article I wrote about this car in 2004, which was published in Volume 1 Number 4 of the B&O Modeler e-magazine. In addition, a piece on painting and lettering this car was published in O Scale Trains magazine in issue # 20 of May/June 2005. This piece is a re-write with a number of differences photos. This model was basically built like Walthers/All Nation type kits. While an old method, it can still yield respectable results!
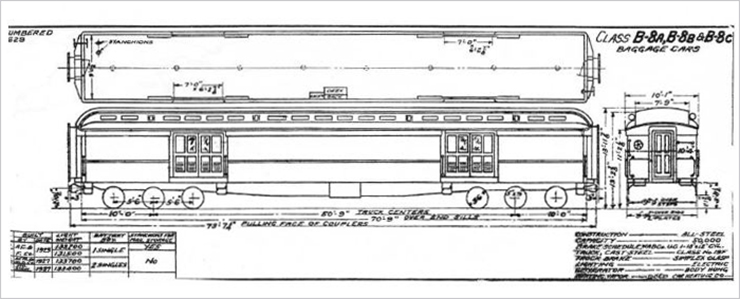 To build any model with reasonable accuracy, one needs photos and a plan or diagram with at least a few key dimensions.
 The first order of business for me was in making the sides, which are quite different from anything put into a kit.
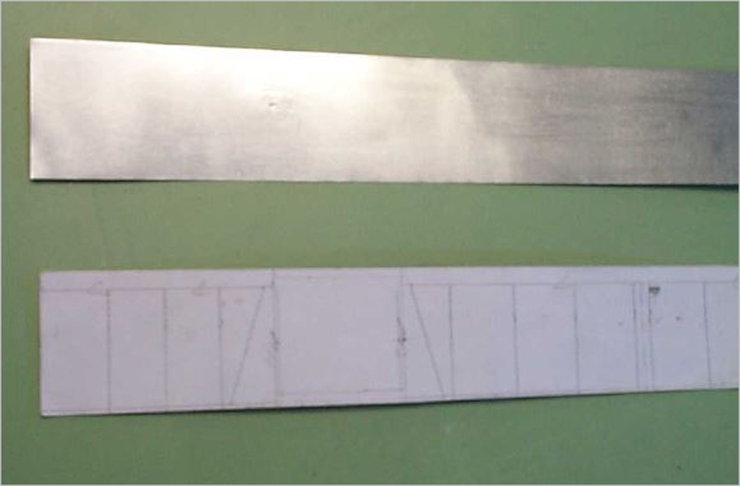
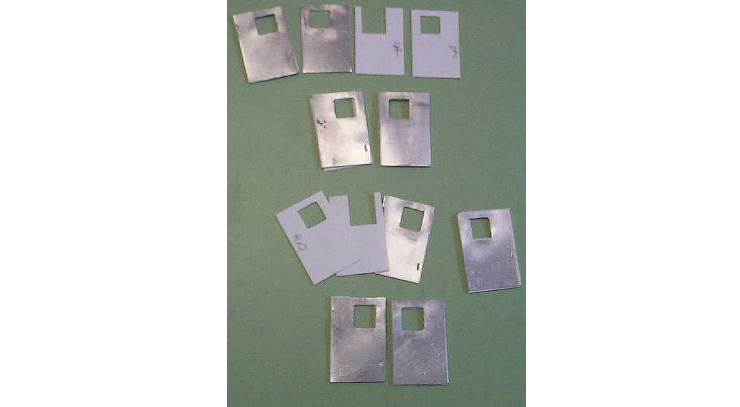
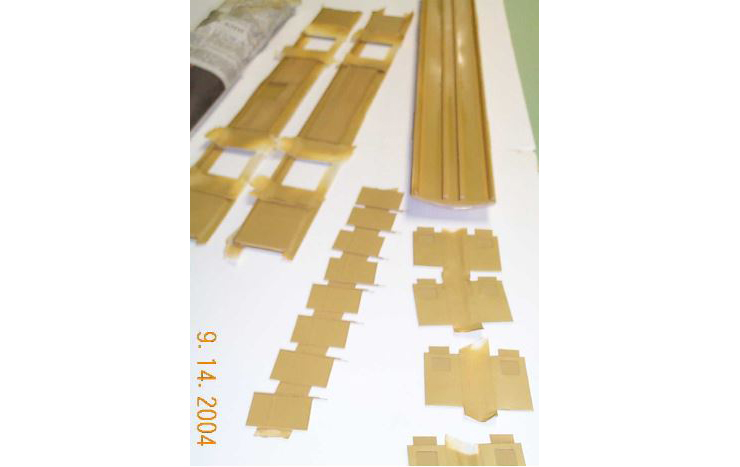
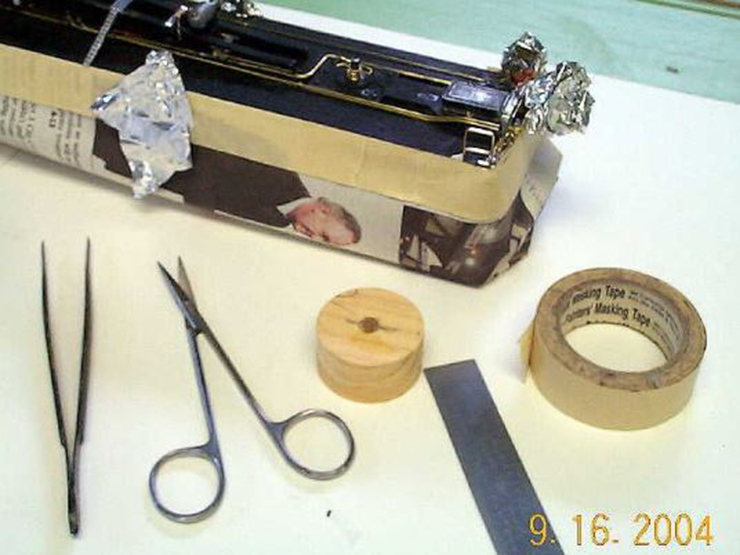
The sides are made from aluminum roofer’s flashing, available in rolls at Lowes or Home Depot. While having a good thickness for making car sides, it has hard and soft spots which must be dealt with in forming details. The paper pattern marks the rivet pattern for the car sides in reverse. It is fixed to the inside of the aluminum car side strip with tape along the edges. Rivet lines are embossed into the car side by following the lines on the papered side. A pounce wheel could be used, or even a NWSL riveter, if one has the patience. Yet working the riveter with a long strip like a passenger car side has its own challenges!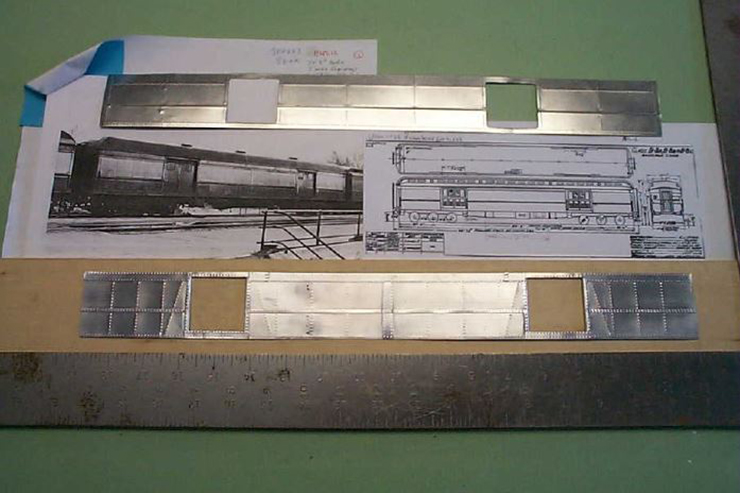 One car side has its rivet impressed belt strip and center batten applied. The car side at the top awaits final treatment. Careful measuring and use of a machinist’s square is critical for making a well fitted car body. The prototype photo showed where some welding repairs were made. These were modeled by scribing weld bead lines into the back of the car sides with a nail and straight edge. The door openings were cut 1/8” narrower on each side, to allow the sides to be bent inward for the doorway insets.
 The door side oopenings were cut out with a Dremel wheel. Aluminum strips with rivet impressions were added for the door sill and header braces, top plate (letterboard), belt line strip and seam battens seen in photos. Rivet detail was not embossed where the welded patches were located.
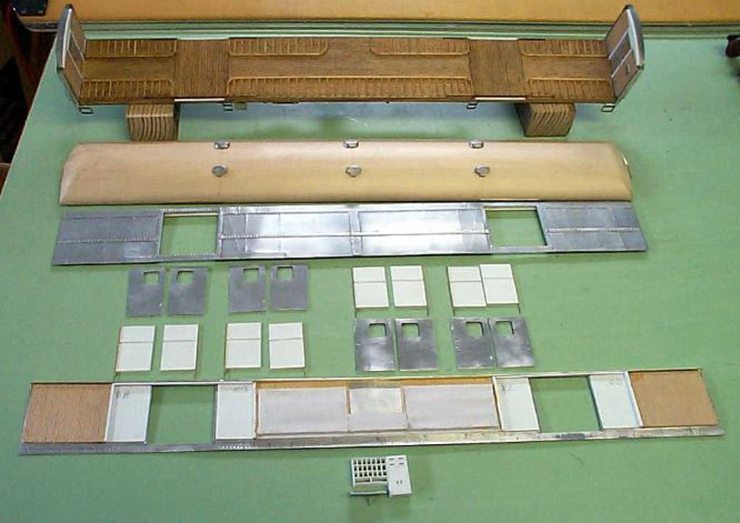
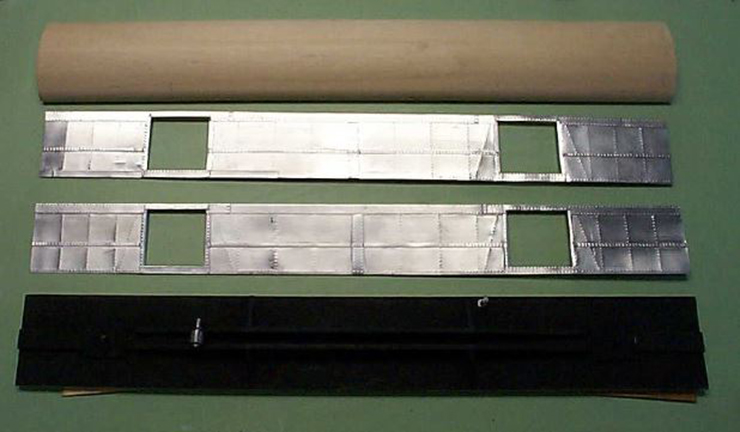 So far, two sides a piece of arch roof stock and the floor/underbody are on the table. The floor/underbody already has its center sill, cross bearers and generator mounted. Also a coat of flat black paint. Painting the underbody before attaching all the details assures coverage in hard to reach places. The car ends will be next. They are former Walthers parts made by Keil Line. More work will be needed on them.
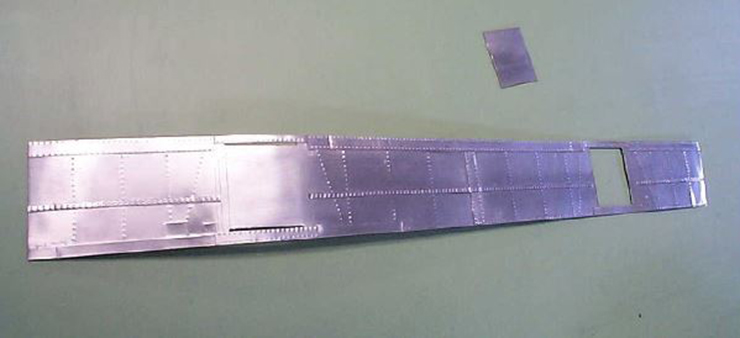
The bent in sides for a doorway inset can be seen in the photo below.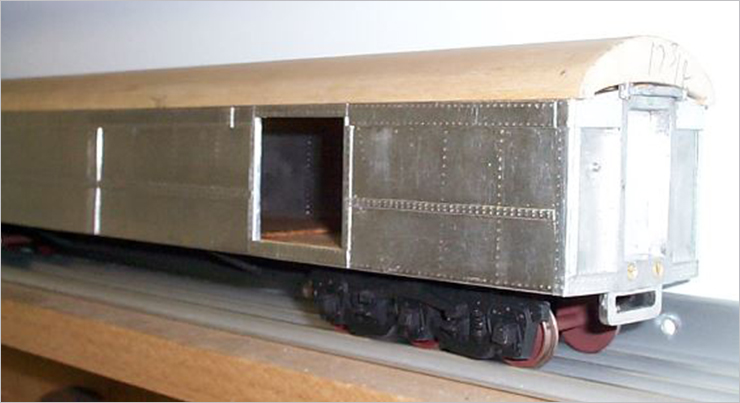 With both car ends fitted to the floor/underbody and the sides temporarily fitted in place with pieces of double stick tape, the roof is checked for fit and trim. The roof ends were shaped with a bench disc sander to match the prototype.
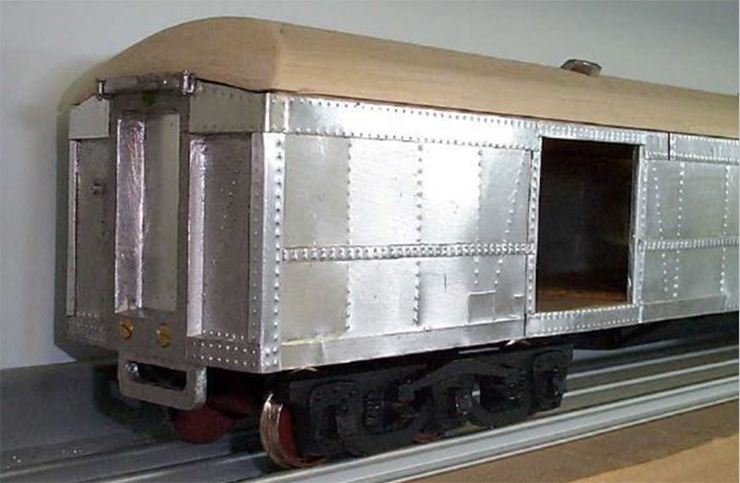
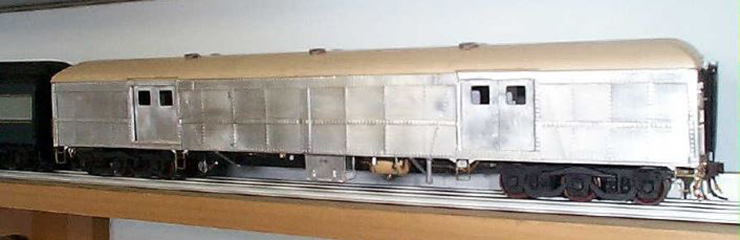
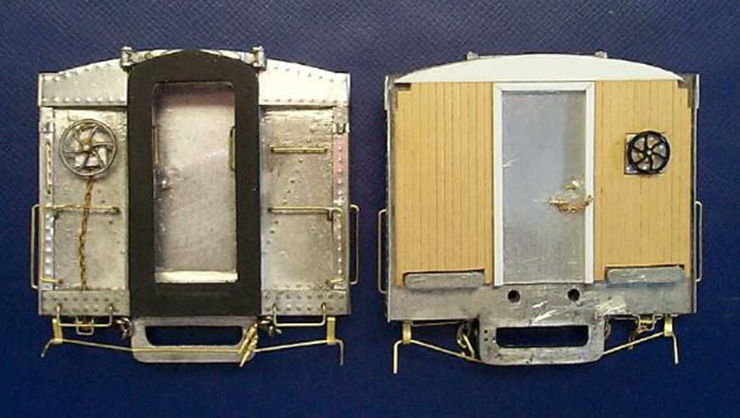 Both car ends were alike. Here are both sides of the car ends, with their details in place. A check on the new car’s riding height was done by coupling to a Walthers kit built combine.
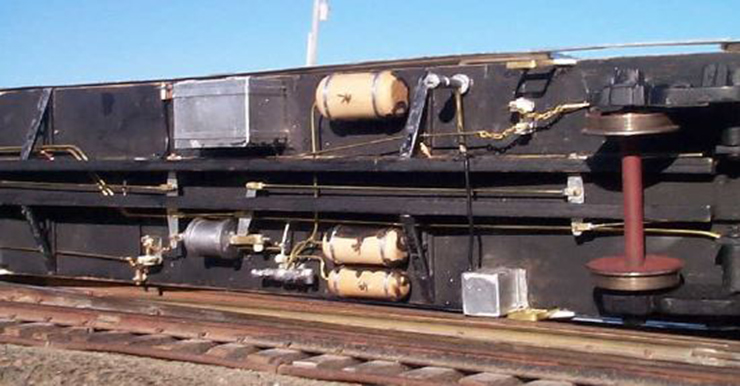 Underbody details were not forgotten. Here, brake rigging and piping has been done along with other under body items including the battery box, hand brake compound wheels, steam trap and battery charging relay box.
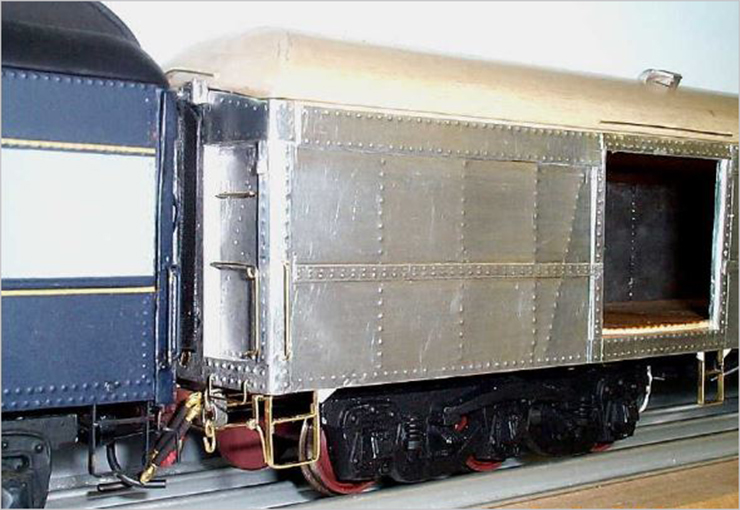
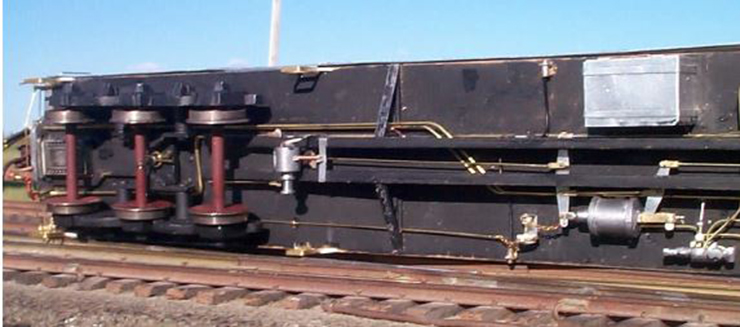 The trucks are old and worn Walthers items, refitted with brass tube journal bearings for a new life. They are attached to kingpins with cotter pins.
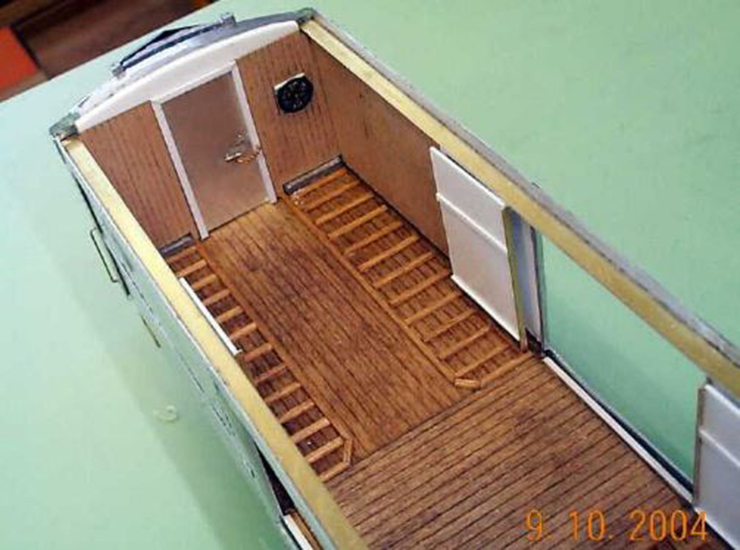 With exterior done, it’s now the interior’s turn at the work bench. Scribed sheet wood was applied for the car flooring and walls, with strip wood cut and fitted for floor stand-offs, which kept the bottoms of packages and baggage dry, should any rain or snow get into the car while loading or unloading in bad weather. Styrene panels are in place for the working doors’ pockets. The doors were made in sandwich fashion, with thin sheet aluminum outsides and styrene middles the same thickness as the glazing inserts would be.
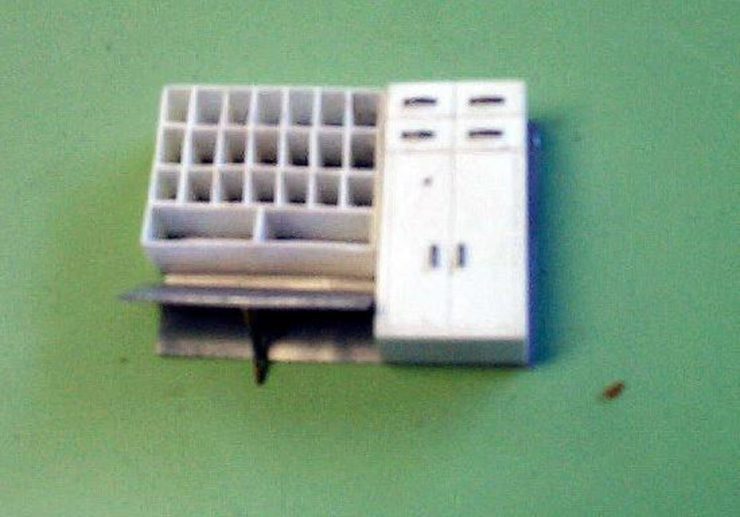
 The doors are test fitted into their floor and upper tracks. A messenger’s desk with pigeon holes for company mail as well as a locked safe cabinet for valuables is made of styrene, brass wire and thin sheet metal for the desk. The prototype was made of monel, a nickel based metal
 All together and awaiting its turn for paint and lettering. Of course, it must be disassembled to do that! The roof got 5 coats of rubbed down sanding sealer before gluing on the six ventilators.
 From the inside out, first B&O golden tan is applied to the interior walls. The underside of the roof will be masked off at the sides, to receive a coat off flat white house paint. Hey, it’s cheap and covers well in one coat!
 First, masking the body for flat black on the underside. The roof was also painted in the same air brush shoot.
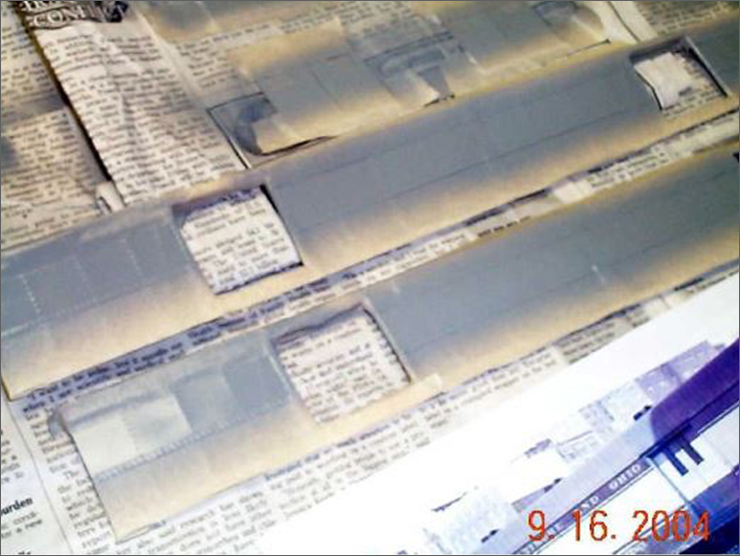 Next, the sides were masked for B&O Gray.
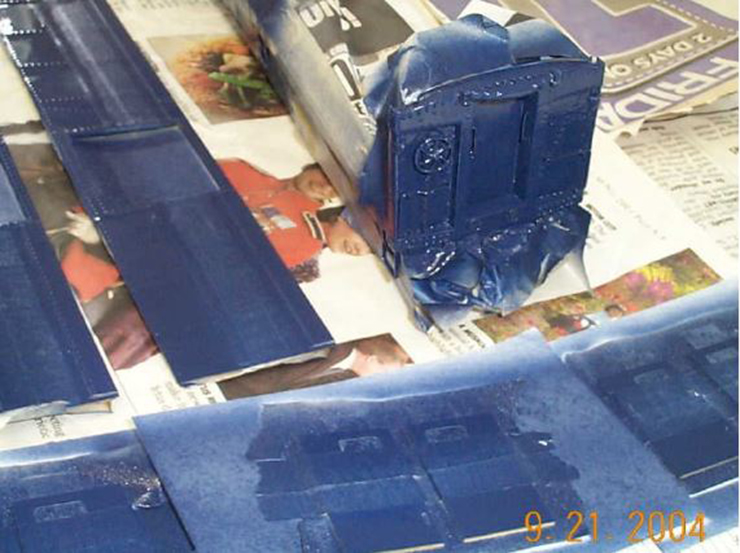 Followed by B&O Royal Blue after the Scale Coat gray dried for a few days.
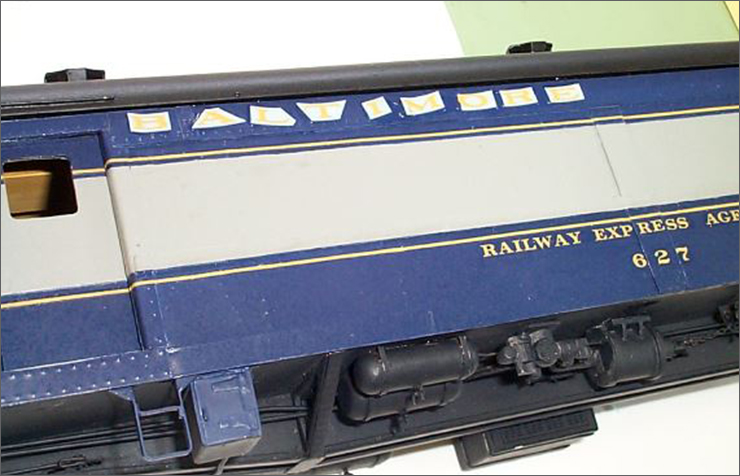 Champ B&O passenger decals in Dulux imitation gold were used, along with 1”striping. In order to fit the road name correctly, every letter had to be applied separately.
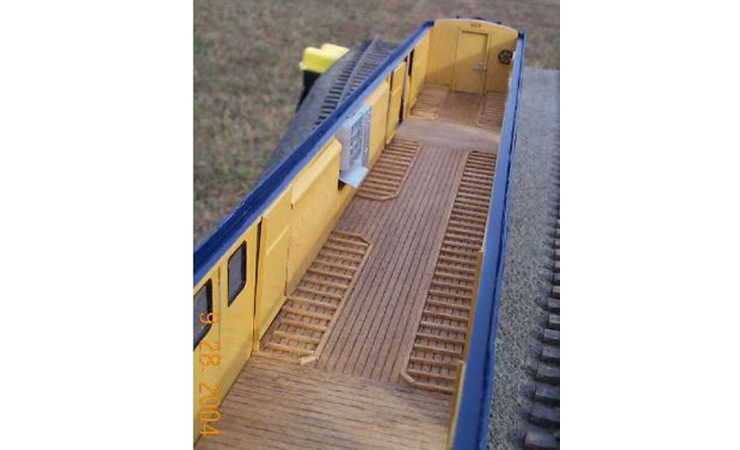 The finished car interior. Unknown to me at the time, B&O painted their baggage car floors Tuscan red. I used Min-wax! Oh well, maybe I will repaint the floor later, if so moved.
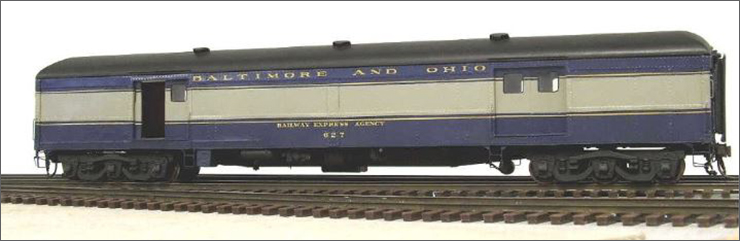 B&O 627, out of the shop and ready for service!
The roof on this car (and a several other passenger cars I’ve built), is not fastened to the car body but is made to have a snug fit. It can easily be lifted off to see the interior details. The roof just goes for the ride anyway. With care in handling the car, it stays in place quite well.