


Ed Bommer
B&O Class M-24a Cement Hopper Boxcar
In the years of the 1930s Great Depression, work was in short supply and the number of unemployed workers was disturbingly high. Grudgingly to provide work, public works projects were funded by the Federal government, as well as assistance to eligible corporations for making improvements that could lead to providing better service. Among them were grade crossing elimination projects mainly for large city areas. Railroads also invested to make improvements by replacing old wooden structures with those built of brick, steel and concrete.
Shown below is a section of about five miles of dual track grade crossing elimination under construction for Staten Island, done by the B&O with NewYork State and Federal matching funds.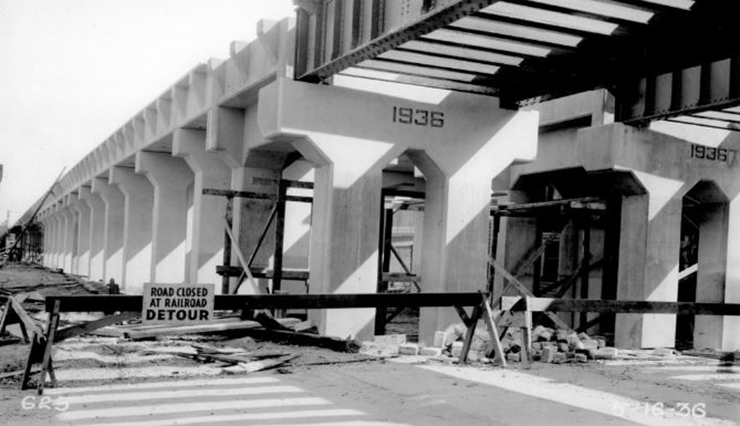
Most of this work was done from 1934 to 1939. About three more miles of the two track line to be put below grade into a long cut, would not be finished until the 1960s. The B&O New York Terminal subsidiary Staten Island Rapid Transit hauled freight, as well as running frequent third rail powered commuter service with over 500 trains a day. A B&O valuation photo copy by “Trolleyworks” of Merrick NY.
The concrete piers were cast in place, joined by spans that were individually cast in molds at the Arlington freight yard concrete plant, which was almost 10 miles from the location shown here. The concrete spans were transported on flat cars, to be placed by a crane moving on temporary viaduct track as work progressed. This was one of several large scale B&O projects involving concrete work during the 1930s.
The B&O was a frugal railroad from Day One. Frugal does not mean cheap or stingy, it refers to making careful use of materials at hand. With the increased demand for concrete installations and structures, a huge amount of cement as needed as well as the ability to transport it in bulk for large projects. To this end in 1933, B&O converted forty of its USRA single sheathed boxcars of Class M-24 into cement carriers, with roof hatches and hopper bottoms. They became Class M-24a.
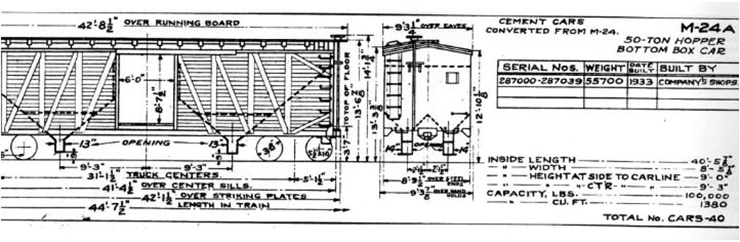 B&O diagram for the M-24a cement-hopper-boxcar. Unfortunately cut off, as my scanner does not go beyond 11”. Not shown are the four roof hatches installed on these cars.
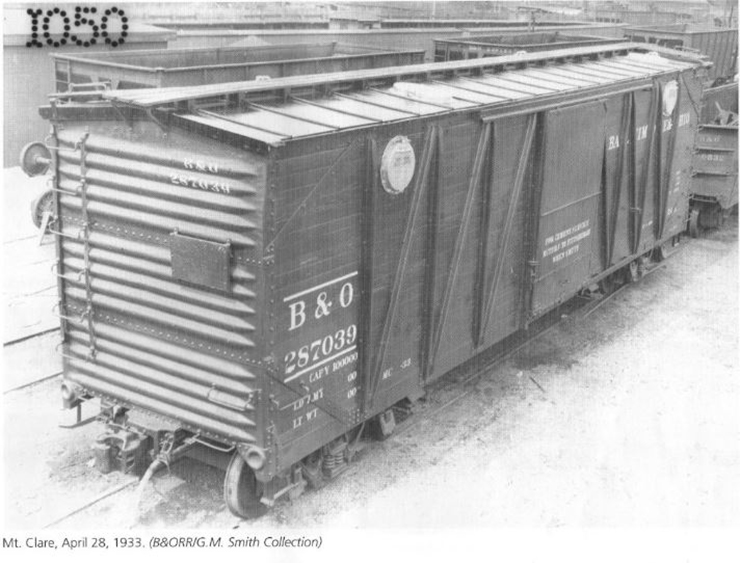
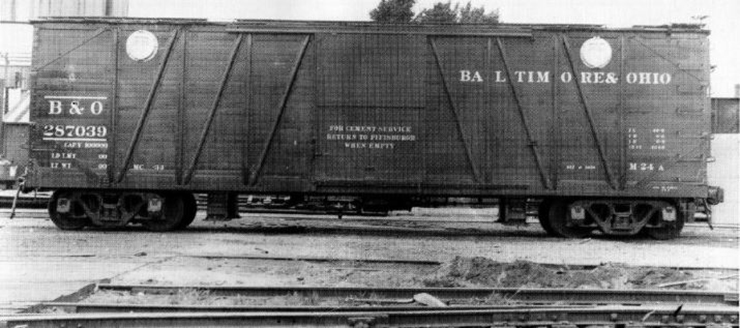 Fresh from Mount Clare car shop in 1933, B&O 287039 awaits its first assignment. Those upper side loading hatches would be removed within a year, leaving just the four aluminum painted roof hatches. A bit hard to see, they are the short, bright strips at the roof line.
An article written by Greg Smith about building an M-24a cement hopper boxcar in HO appeared in the 4th Quarter, 2000, B&O Historical Society magazine “The Sentinel.” It provided the inspiration I needed by 2002 to work over a cast resin O scale kit that had been lying in a storage box since 1995.
This car was modeled in O scale with a 1980s Chooch cast resin single sheathed USRA boxcar, kit number 3146. This was when Chooch packaged their kits wrapped in a soft, cotton like sheath. The kit was a gift from a fellow model railroader who knew I was a kind of champion for lost causes. It suffered bowed sides and a warped floor/underframe casting.
To address that, the affected parts were cleaned and laid out on some aluminum foil smoothed out in a sturdy, flat bottomed baking pan. About 10-15 minutes at 150 degrees or so in the oven softened them enough to be gently flattened out by prodding with a wide piece of strip wood, to coax them back into their proper shape. Once done, the pan was put into the fridge for a few minutes to chill the parts and better hold their shape. This was secretly done while I was home alone!
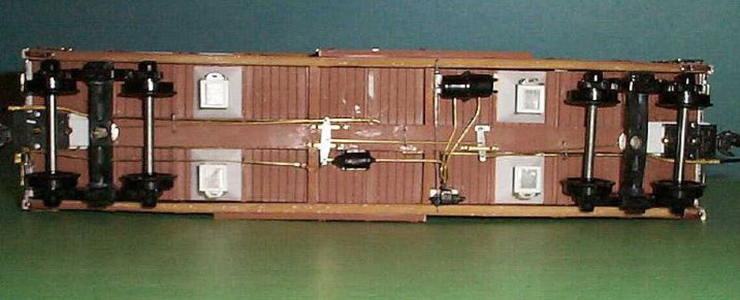
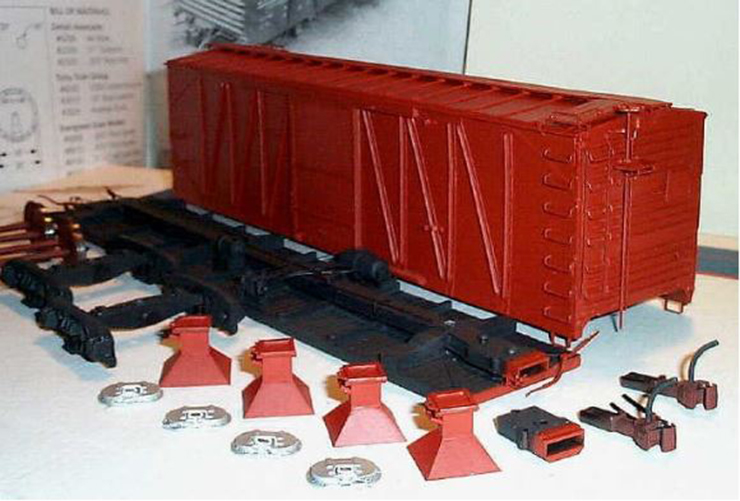
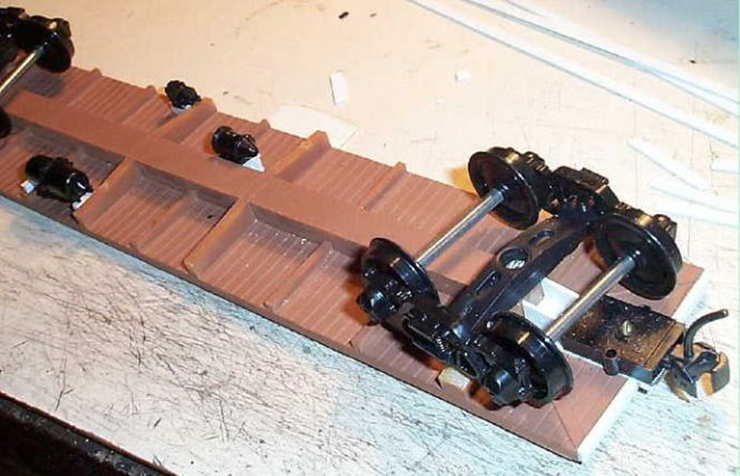 The flattened Chooch floor/under frame, with couplers, trucks and three piece AB brake set in place. Age related shrinkage had shortened the casting, so each end got a thin styrene strip to bring it back to the correct length to match the car sides.
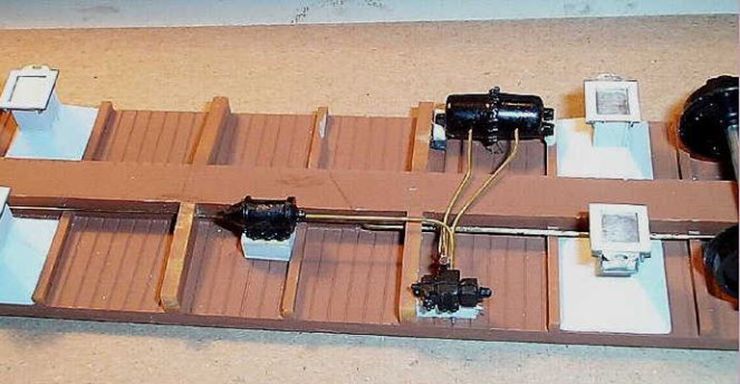 Brake piping has been installed. The rigging will be done later. The hoppers are in place to check clearances. Making them is seen below. Styrene rectangular tubing and sheet stock are cut and fitted to make four hoppers, based on dimensions in the B&O diagram above.
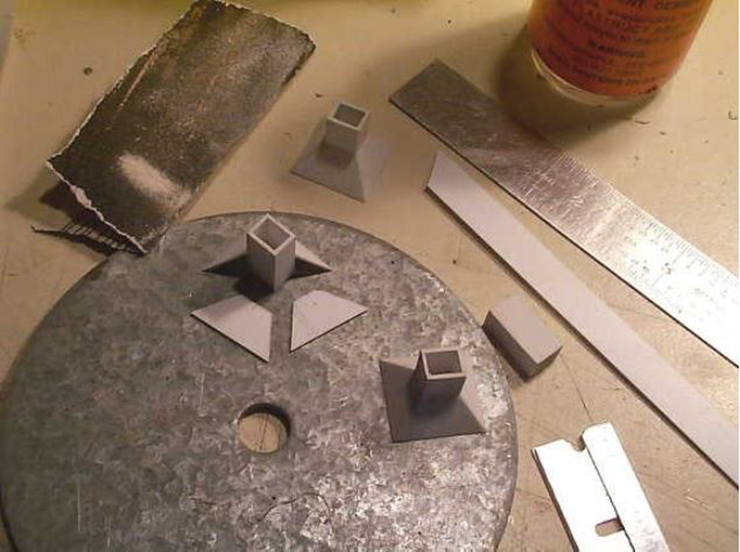
 The completed hopper has added details made of thin sheet aluminum and styrene. An enlargement from the prototype photo was used as a reference.
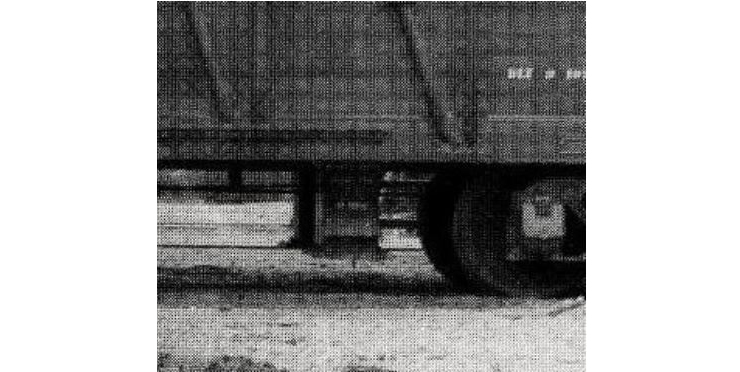 While not the best of photos, part of the discharge chute shows up enough to be guess-timated. This part in O scaled is rather small.
 Assembling the body was next. Unseen, I added internal transverse bulk heads made of 1/8” thick sheet wood, to reduce the likelihood of the car sides gradually caving inward from handling. It was a common failure of early Chooch kits. The kit’s roof ribs were carved off, the roof sanded and new styrene ribs fitted per the diagram and photos of the B&O prototype. To help keep air pressure equalized inside this tightly sealed box of cast resin and metal, I drilled a 1/32” hole through the floor, close to the inner side of the center sill. It is under the main brake lever.
 Finally, brake rigging was installed. The hoppers right now are only wedged in place.
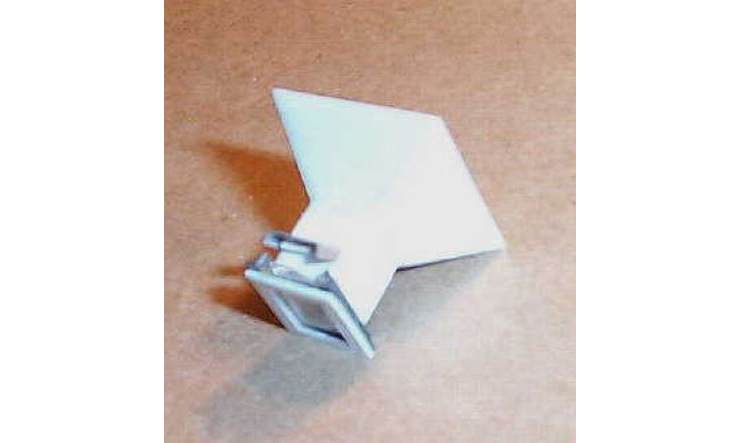
 Four roof hatches were made with sheet styrene and thin brass strips embossed with rivet and bolt detailing. There are two hinges with hinge pins, a lift handle, latch and lock.
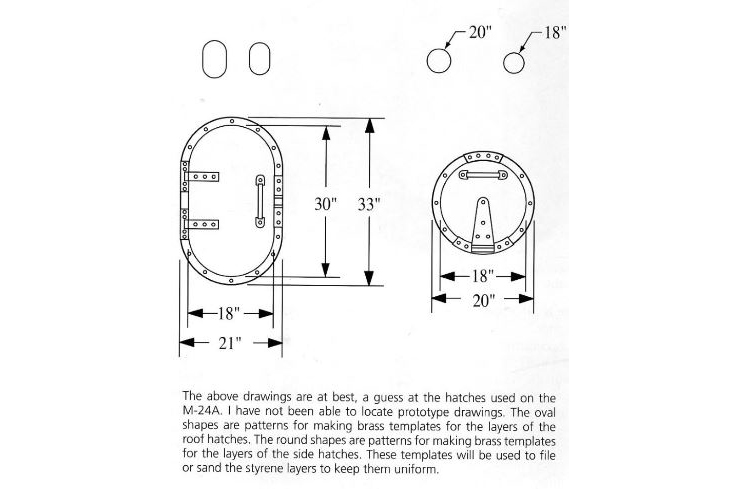 From the HO construction article by Greg Smith, B&ORR HS ”The Sentinel,” 4th Quarter 2000. Photos were not of much assistance either, as seen below. The round hatch is for the car sides.
 Not so easy to see just what a roof hatch was like. However, with a bit of engineering imagination, (keep it simple and functional), a close replica can be determined for a model.
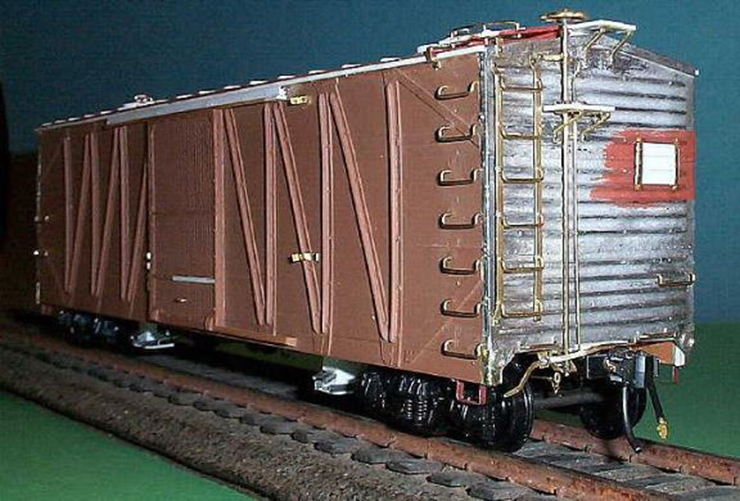 The car’s ”B” end and side detailing was next, with scratch built up grab irons and ladders, Carmer ‘push’ type uncoupling levers, tack boards, grab irons, retainer, brake step and hand brake, with its stirrup and chain connecting it to the brake rigging under the car, along with the air hose. Doorstops, handles, latches and side grab irons were also put on the sides.
 The “A” end was a bit easier to do, in not having a hand brake.
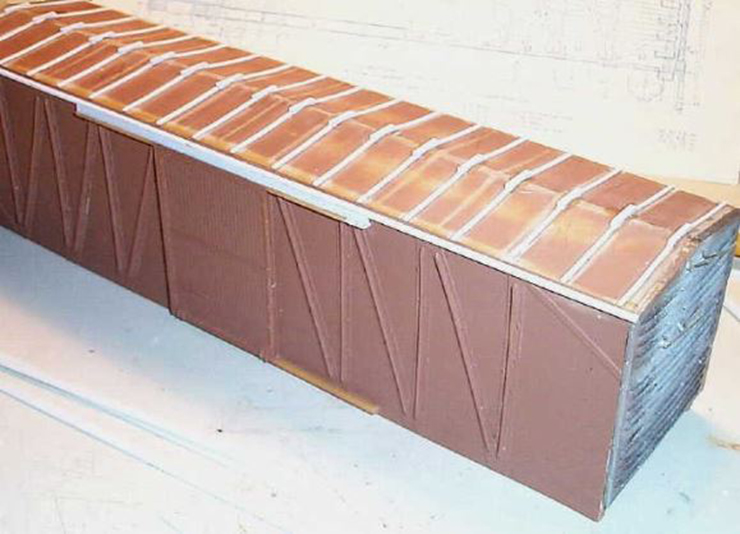
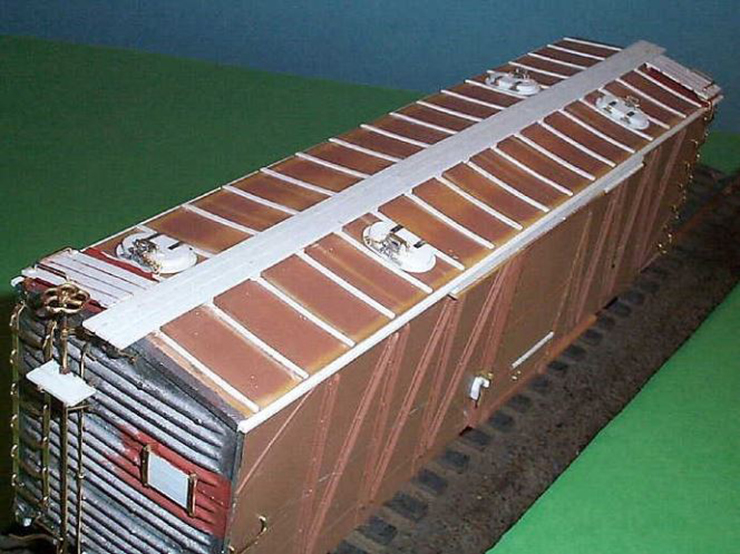 Roof top details were not neglected. The built up styrene running board has bolt impressions on it, along with scored marks to show where individual boards meet. The same level of detail was provided for the corner platforms. The four hatches were permanently mounted referencing a prototype photo. A top edge coaming along the eaves was added with styrene strips.
 Paint at last! The color to be used was a tussle in my mind. B&O freight car brown was the house car color up to about 1945. Light Oxide red was beginning to be used after WW II on reconditioned and new cars. Twenty six members of the M-24 a class were still in service as of 1953. That was more than 50% of the class remaining.
Floquils’ zinc chromate primer was the best match to the new B&O freight car color. So I opted for the newer color on my model. The under body is flat black, as are the Andrews trucks. The hatch covers are aluminum. Rail brown was applied to the Kadee couplers, wheels and axles.
After painting, the hoppers were permanently glued in place under the car. That saved a lot of fancy masking if they had been glued in place earlier! The body was given a spray of Testor’s Gloss Coat for decaling.
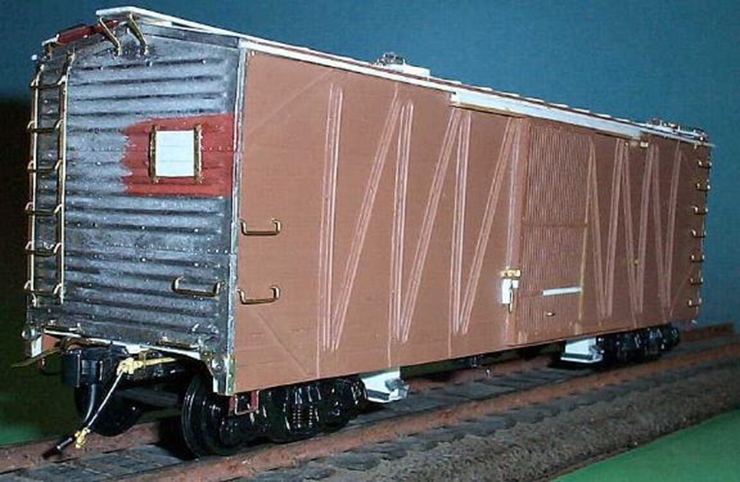
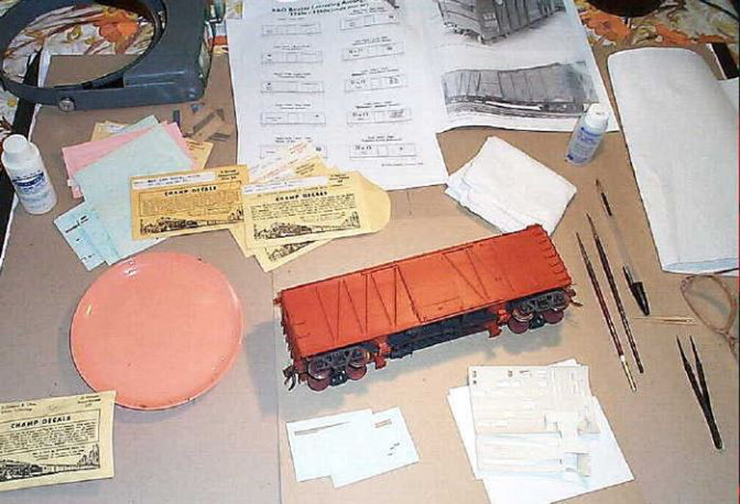 Now for the lettering and there is a lot more of it than one might think! A lettering scheme from the 1940s was used on the model. Data was cut and made up from various left over used sets to get correct numbers in the right places. A fair amount of white railroad Roman alphabet decals in a small size was also needed.
Champ decals were used. To properly letter this car, set N-9 (B&O road name) was used along with data sets OD 1 and OD 2. White Roman alphabet sets L-50, 60 and 70 were also raided to complete the lettering with correct data and signage.
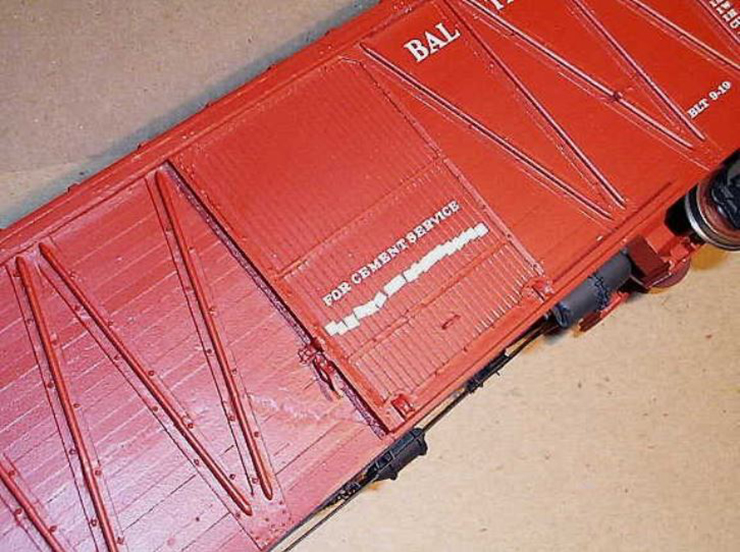 Rather tedious was putting on the door signage: “FOR CEMENT SERVICE RETURN TO PITTSBURGH WHEN EMPTY.”
Here we are, applying that statement, one letter at a time. The door on the other side will also need the same lettering.
 The car data also had to be pieced together to get the correct numbers and weigh station code, as well as the class designation, built date and measurements to the right of the door.
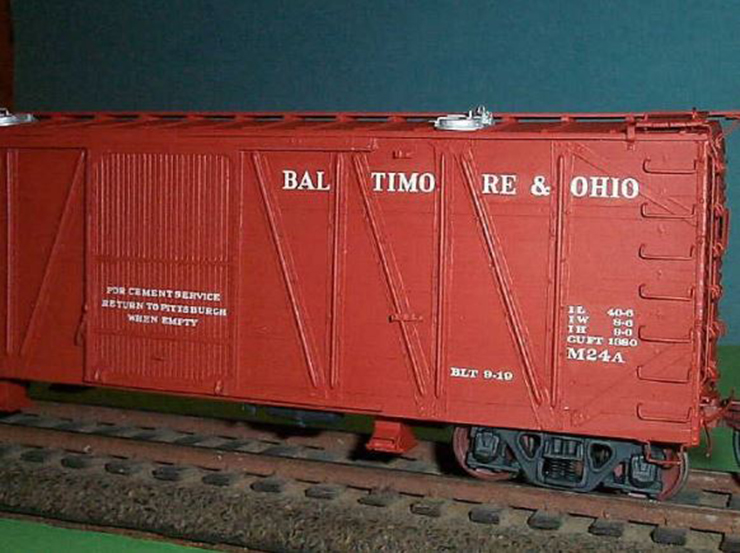
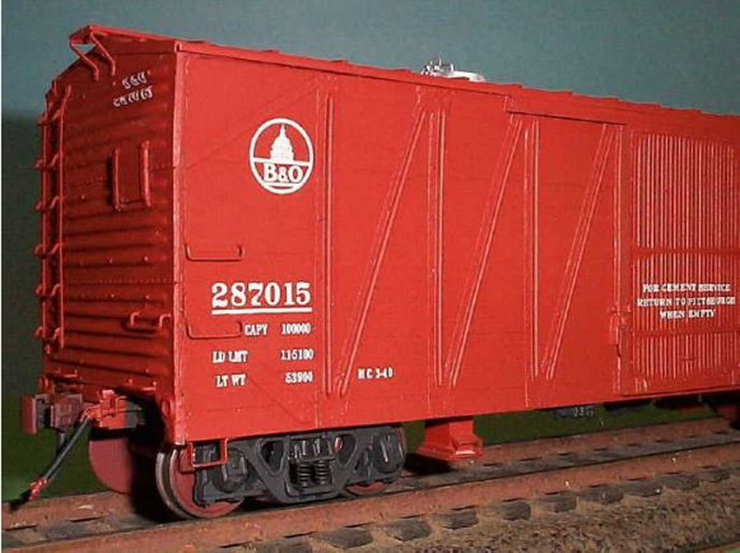
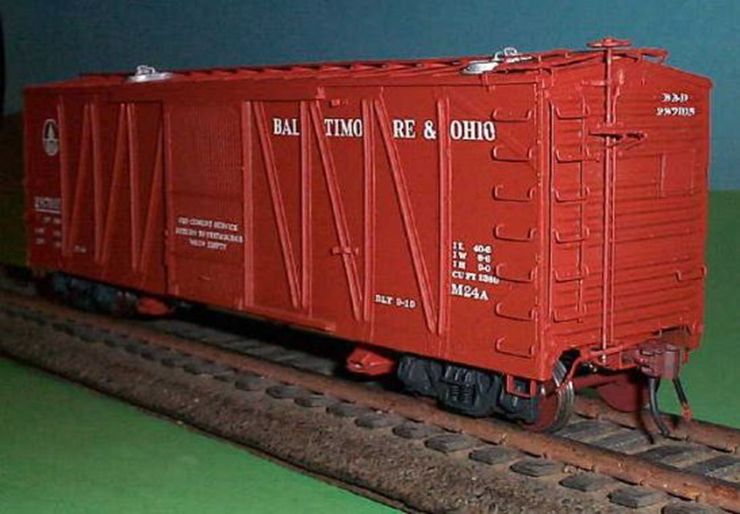 Finished at last, with a light dusting of Dull Coat. Even at 14 years later, I am still undecided about weathering.
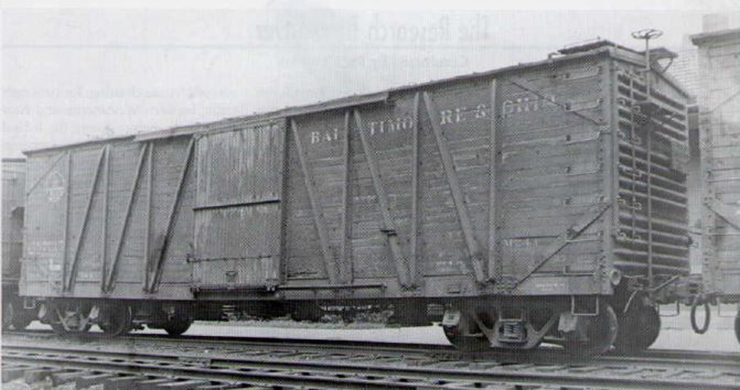 A worn, weary and weathered B&O cement hopper boxcar at Mount Clare, showing heavy use.
A B&O RR/G. M. Smith Collection photo.