


Gary Shrader
Essay 27
AT&SF Class 5001
Axles - Trailing Truck
All,
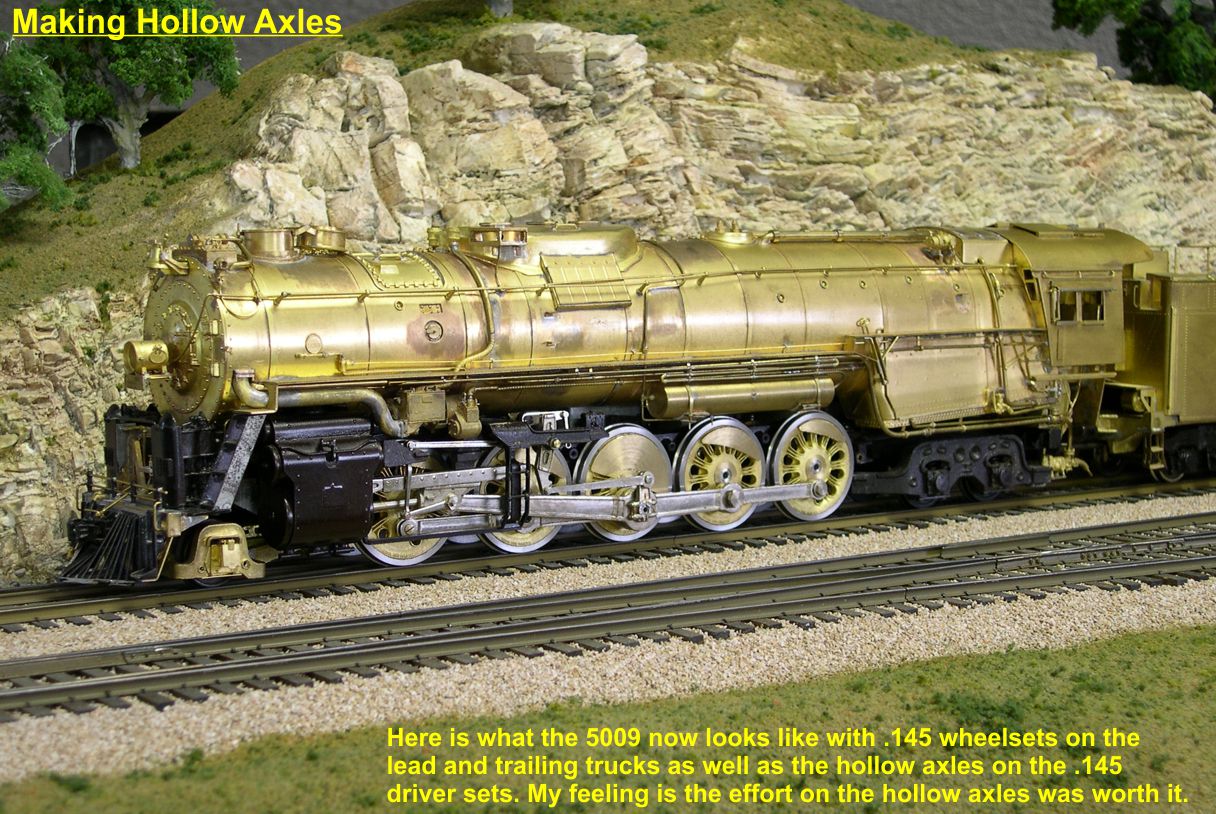
Having finished the B&O EM-1 project plus a couple of minor things hanging around, I am now back onto my own personal ATSF 2-10-4's. While this project was on hold, I decided that it definitely deserved hollow axles on the drivers. With all the other exacting detailing, it would just look wrong without that touch, so this episode is devoted to installing hollow axles on the driver sets. Most of the work involved in this was covered in an earlier project on a C&O Allegheny, so I will not hit every single detail.
The 10 photos labeled " Axles-1" through "Axles-10" show many of the steps involved, although I skipped the re-assembly of the wheelsets due to that being identical with the previously published work. I concentrated on actual fabrication of the axles in this part.
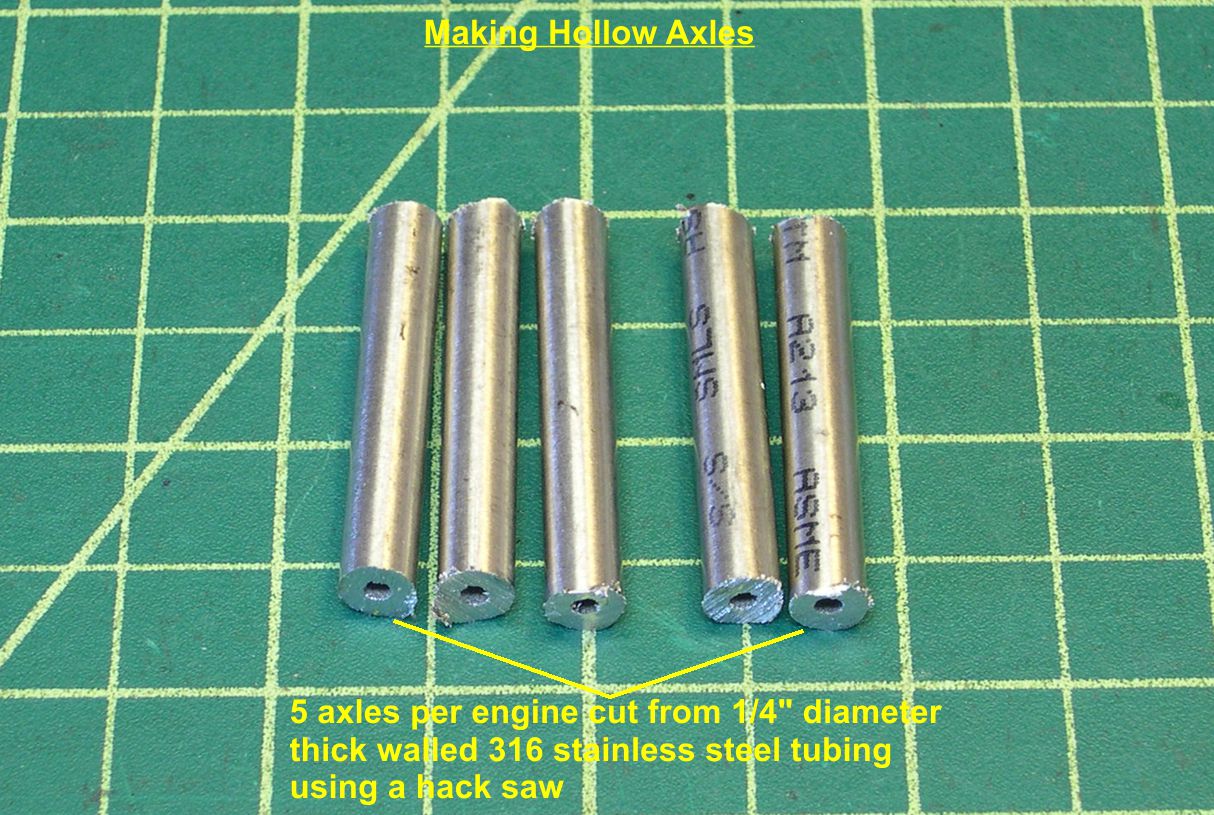
I used the same thick walled stainless steel tubing for these axles, cutting blanks slightly over 1.5" long.
axle 1
⤵
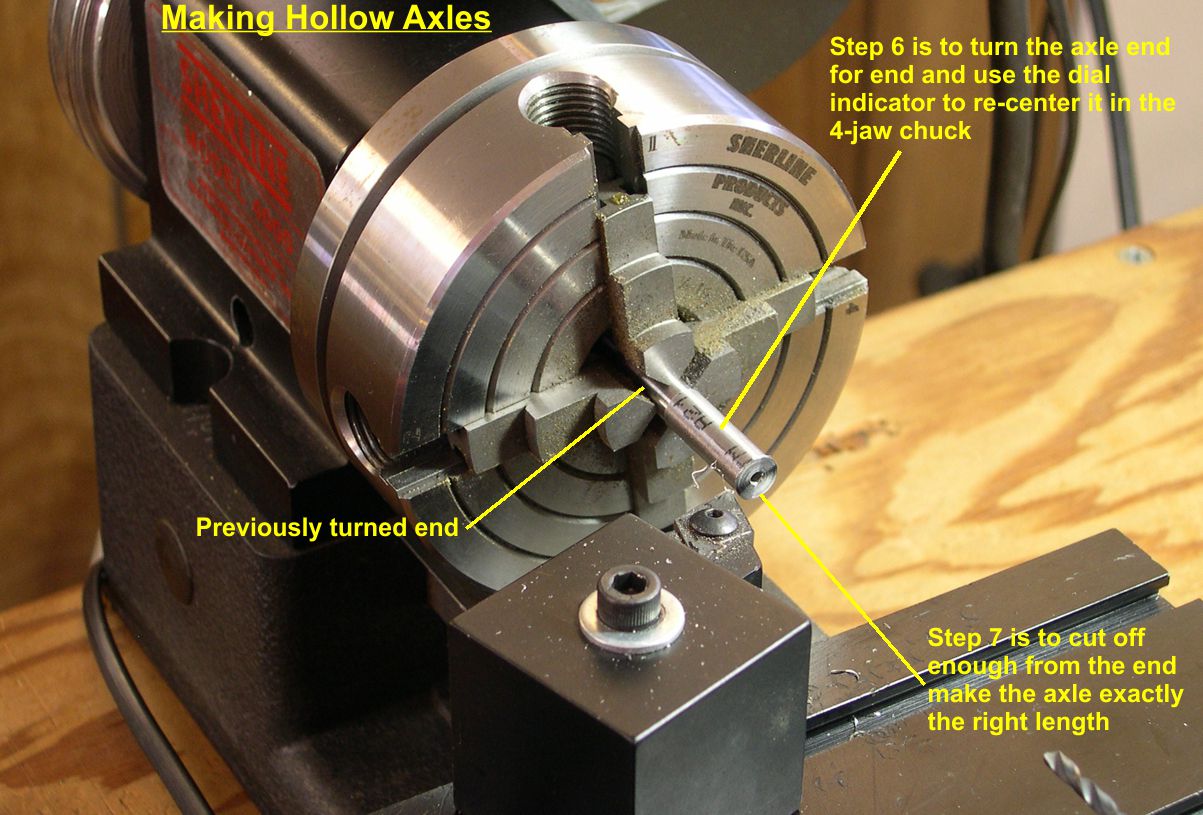
Each blank is then chucked up in a 4-jaw chuck to make exact centering possible. 3-jaw chucks cannot center up parts precisely enough for making axles. The slightest error will show up in rough running engines. In the second photo, I have shown how to use a dial indicator to make certain you have very precise centering of the work piece before you start machining.
axle 2
⤵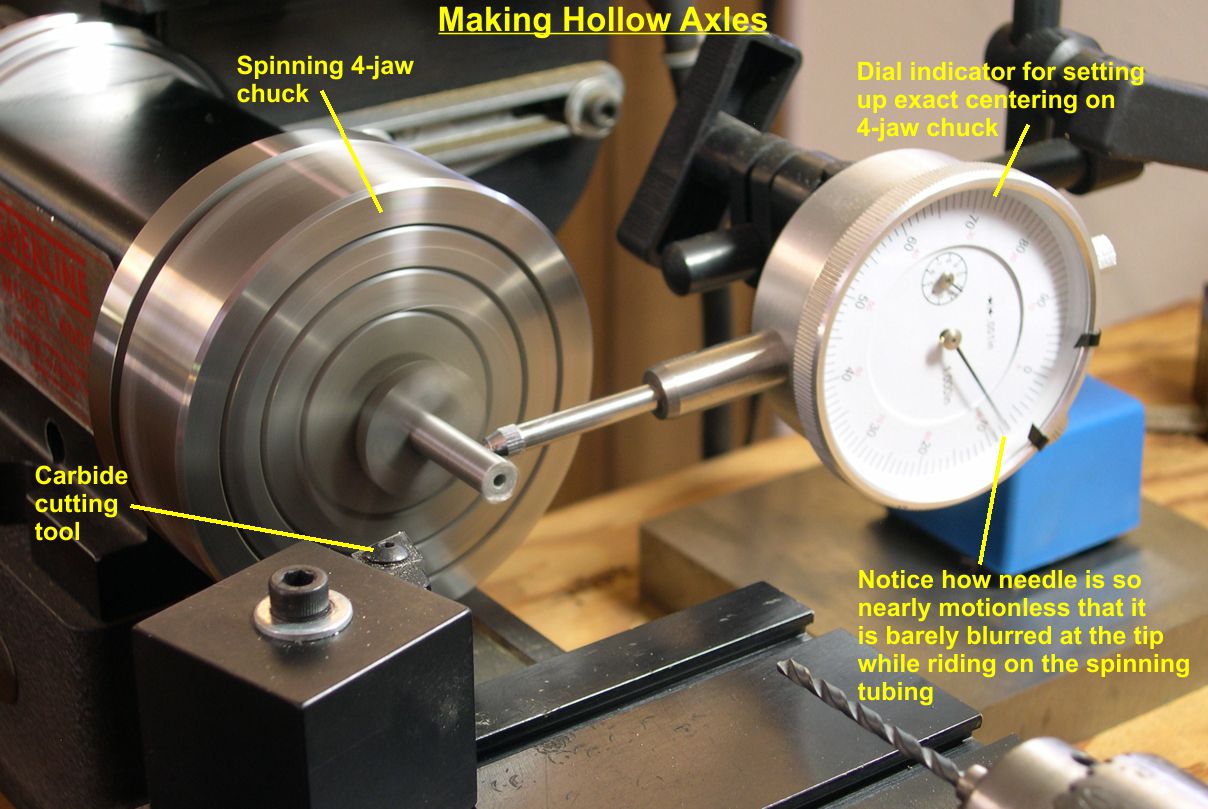
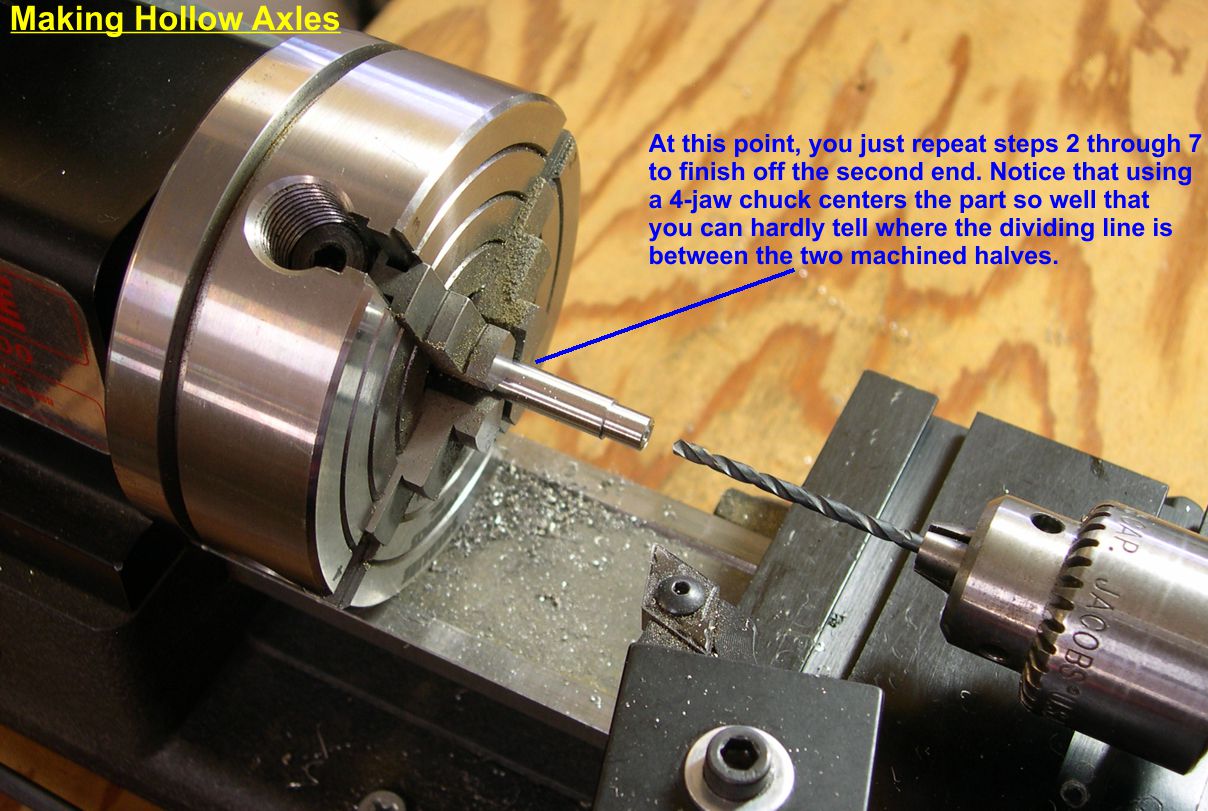
I took the photo with the lathe actually spinning so you could see how steady the dial indicator needle should be. It is barely quivering, so the fairly long exposure photo still gives a clear image of it. The point of all this precision is that after machining the first half of the axle, you have to flip it end for end and machine the second half and still get a very accurate axle out of it. Using the 4-jaw chuck and dial indicator and holding the needle movement to under 1/2 mil total movement, the axle is so accurate that it is hard to tell where the dividing line between the two halves is.
axle 3
⤵
axle 4
⤵
axle 5
⤵
axle 6
⤵
axle 7
⤵
axle 8
⤵
axle 9
⤵
axle 10
⤵
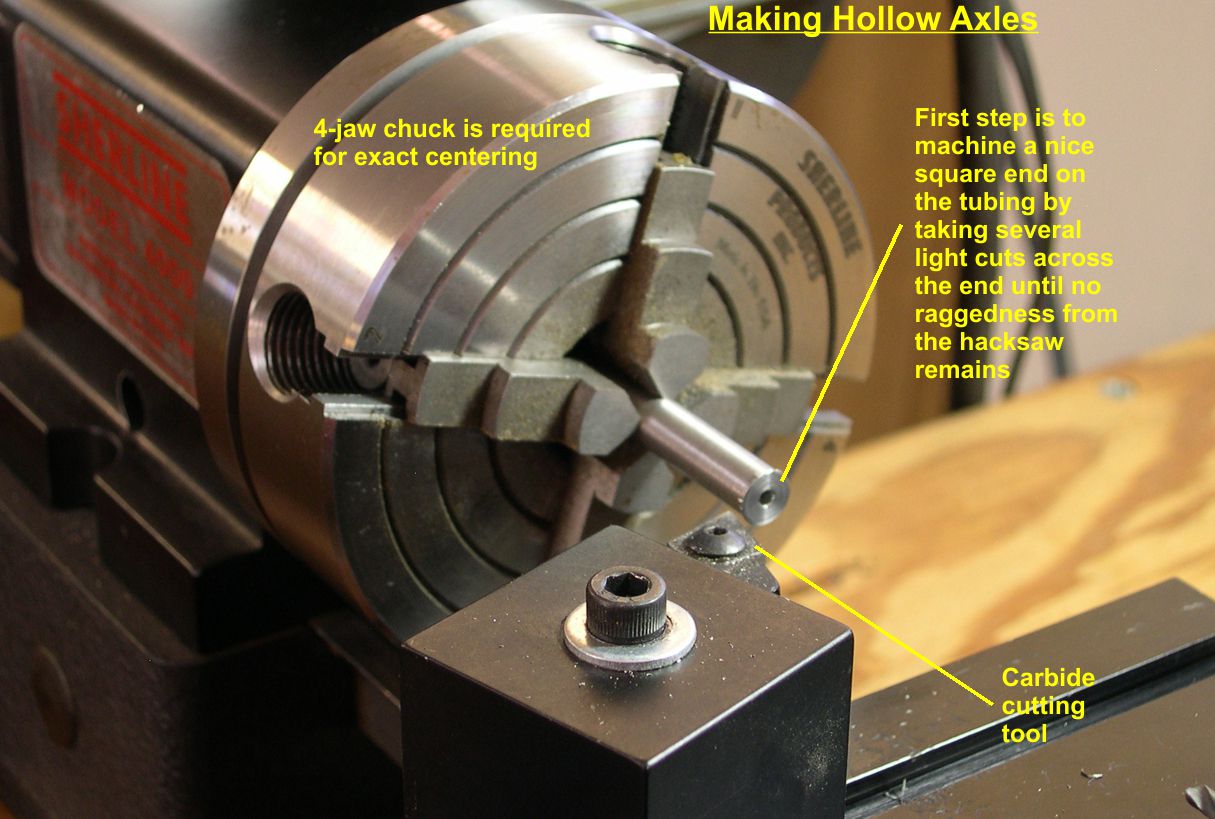
Note that stainless steel is a little "gummier" than cast iron or some other steels. It tends to squeeze over a bit on edges as you machine it. I just knock that off with a file in most cases, unless more precision is needed. On these axles, the hole tends to get filled in a little as the end is machined, so it is necessary to run a drill into it after machining to clear out the squeezed over material.
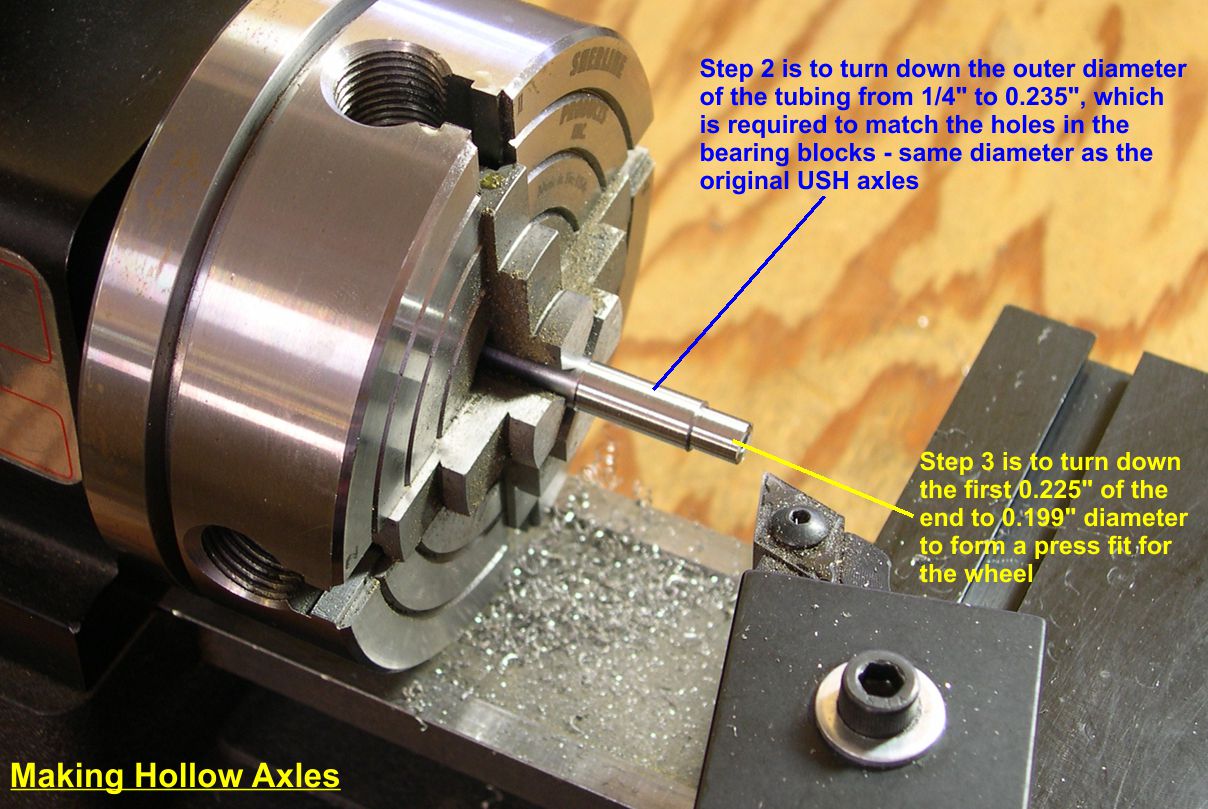
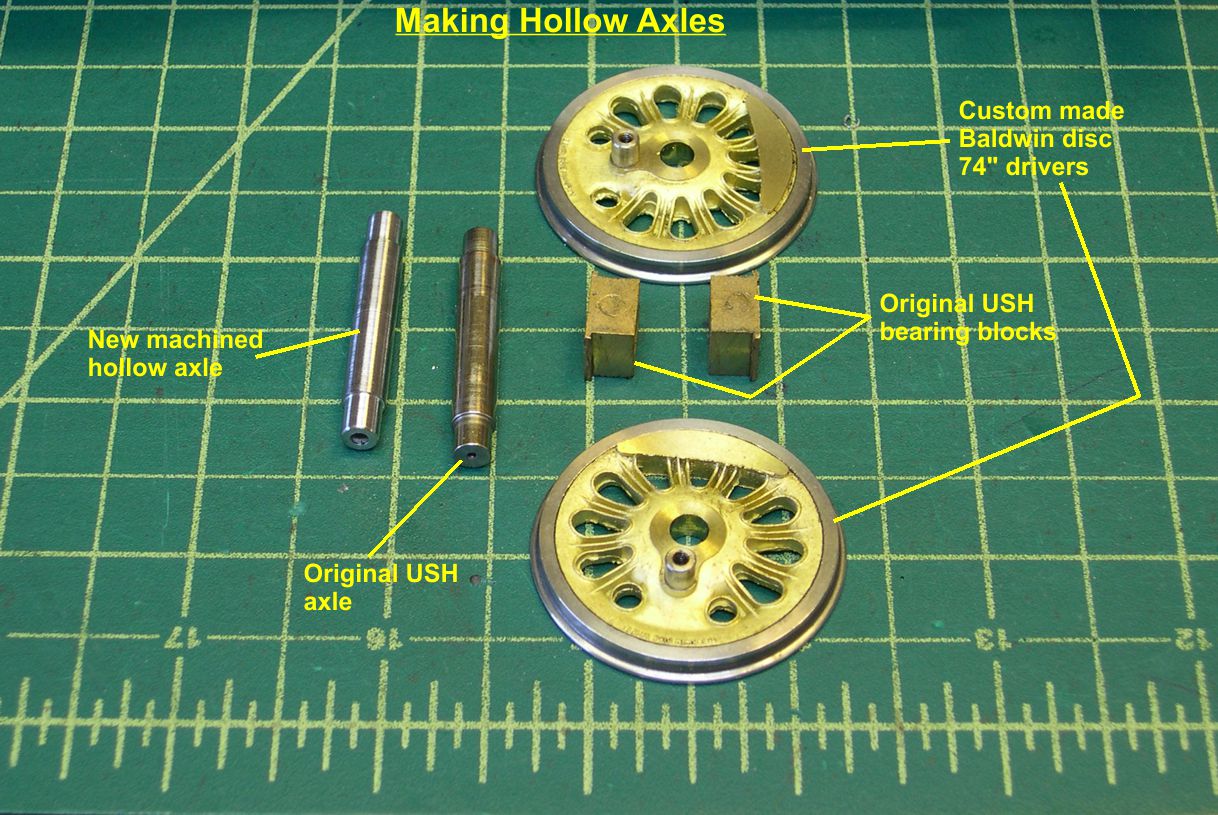
You have to take some very accurate measurements of the original axle diameters so bearing blocks will still fit properly and the wheels will still press on tightly. One problem I ran into was that the person who originally machined the great looking Baldwin Disc drivers did not get all the wheel thicknesses exactly the same. That meant I had to calculate the exact axle lengths separately on each wheelset to get the ends of the axles flush with the face of the wheels. I wound up with some minor errors, but they won't be noticeable after painting, so I did not go to all the trouble of remaking the offending axle.
Another issue involved the axle with the gear on it. USH had knurled the center of that axle so the gear would be a press fit. I had to leave a patch in the center of the axle that was 0.002" greater in diameter to compensate for that and get a good tight press fit on the gear.
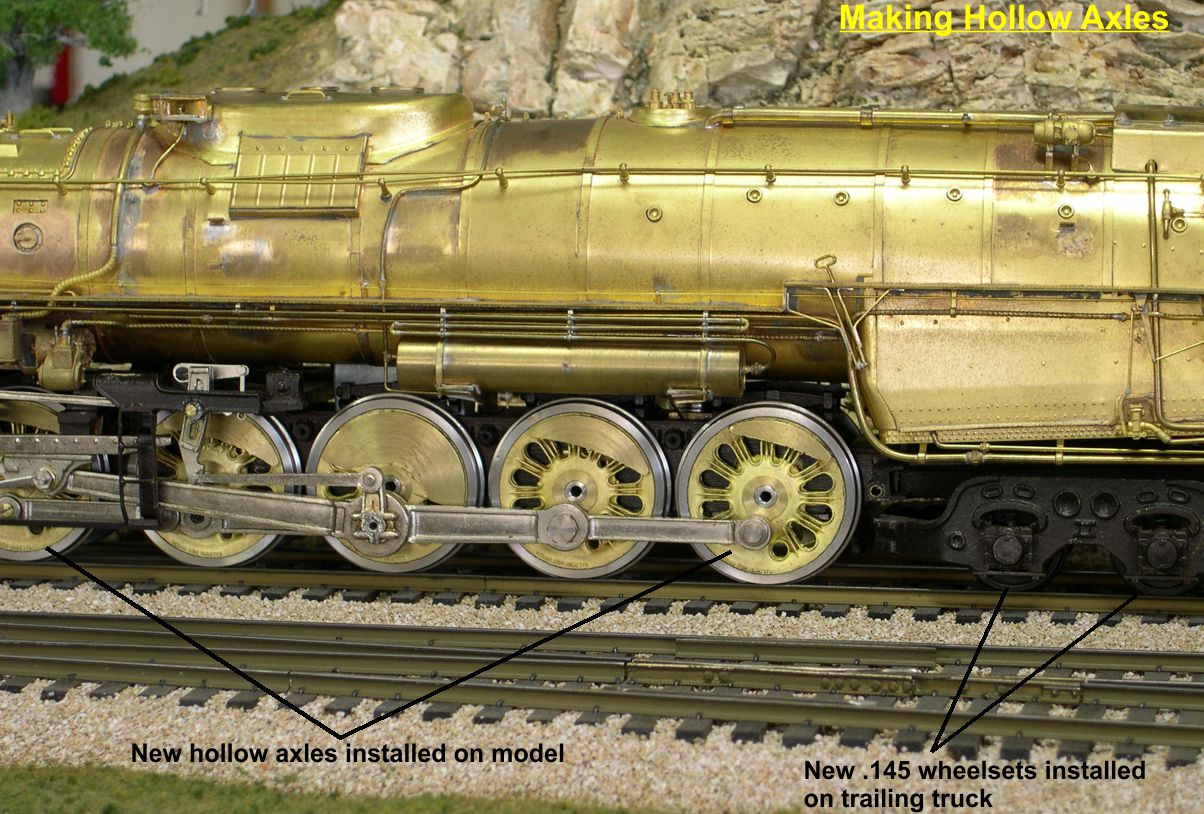
In the photo "Trailing Trk", I show how I fitted NWSL .145 profile wheels to the trailing truck.
trailing truck
⤵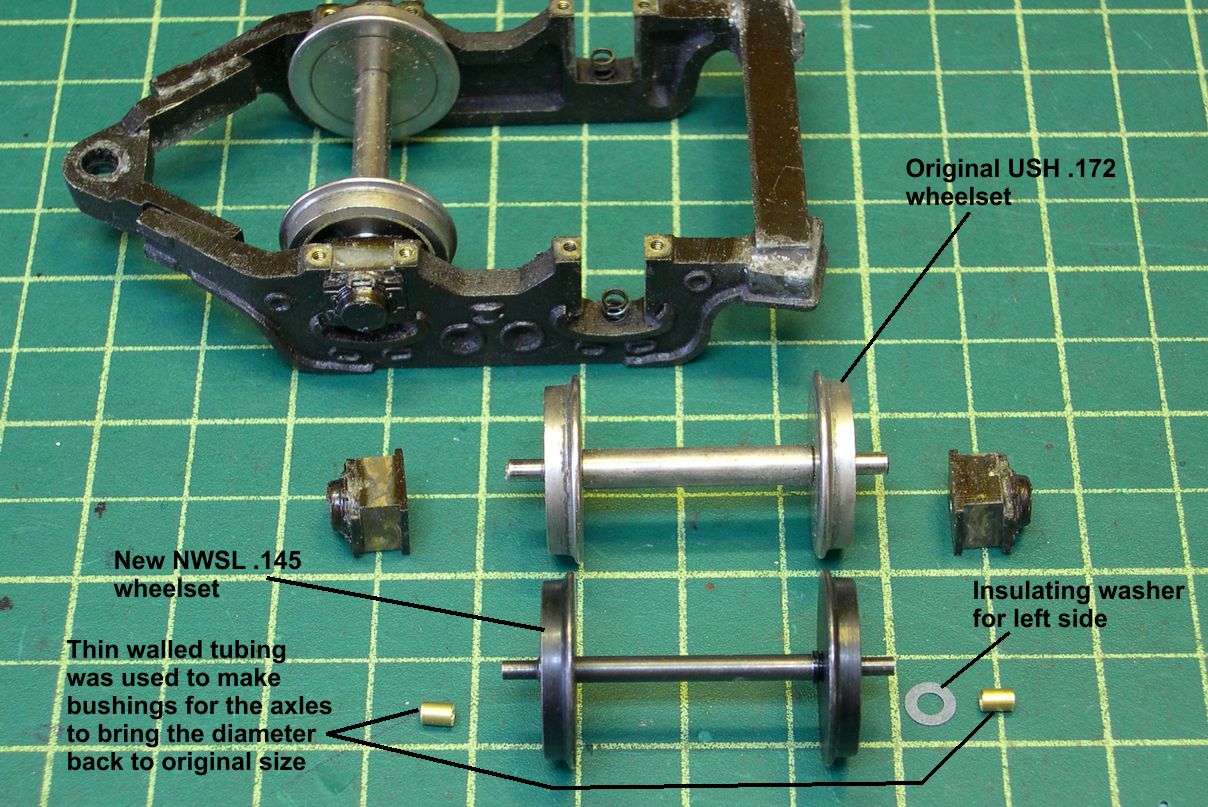
Because the axle ends on the NWSL wheelsets are smaller diameter than the original USH ones, I had to bush the NWSL axle ends up a bit using short lengths of thin wall tubing. One thing you have to watch out for with the NWSL wheelsets is that they are insulated at the axle, not out at the rim. That makes it easy for the wheel to short against the journal block. I fixed that with a thin insulating washer as shown in the photo. You have to do the same thing for the lead truck, of course.
Gary